
Add ads to your app
Paste your AdMob IDs in the AdMob card, ask the chat for ads, and see them as placeholders in the preview.
Two things to do in Bloxks: paste your AdMob IDs once, then ask for ads in the chat. You can do them in any order: the preview works even without IDs, which are only needed to publish.
1. Paste your IDs in the AdMob card
- Open your project, then the Backend tab, then Integrations, and click AdMob.
- In the iPhone section, paste the App ID of your iOS app in AdMob, the one with a ~.
- Then paste one ad unit, the one with a /, in each format your app uses: Banner, Full-screen ad, Rewarded video. Leave the other fields empty.
- Do the same in the Android section, with the IDs of your Android app.
- Click Save.
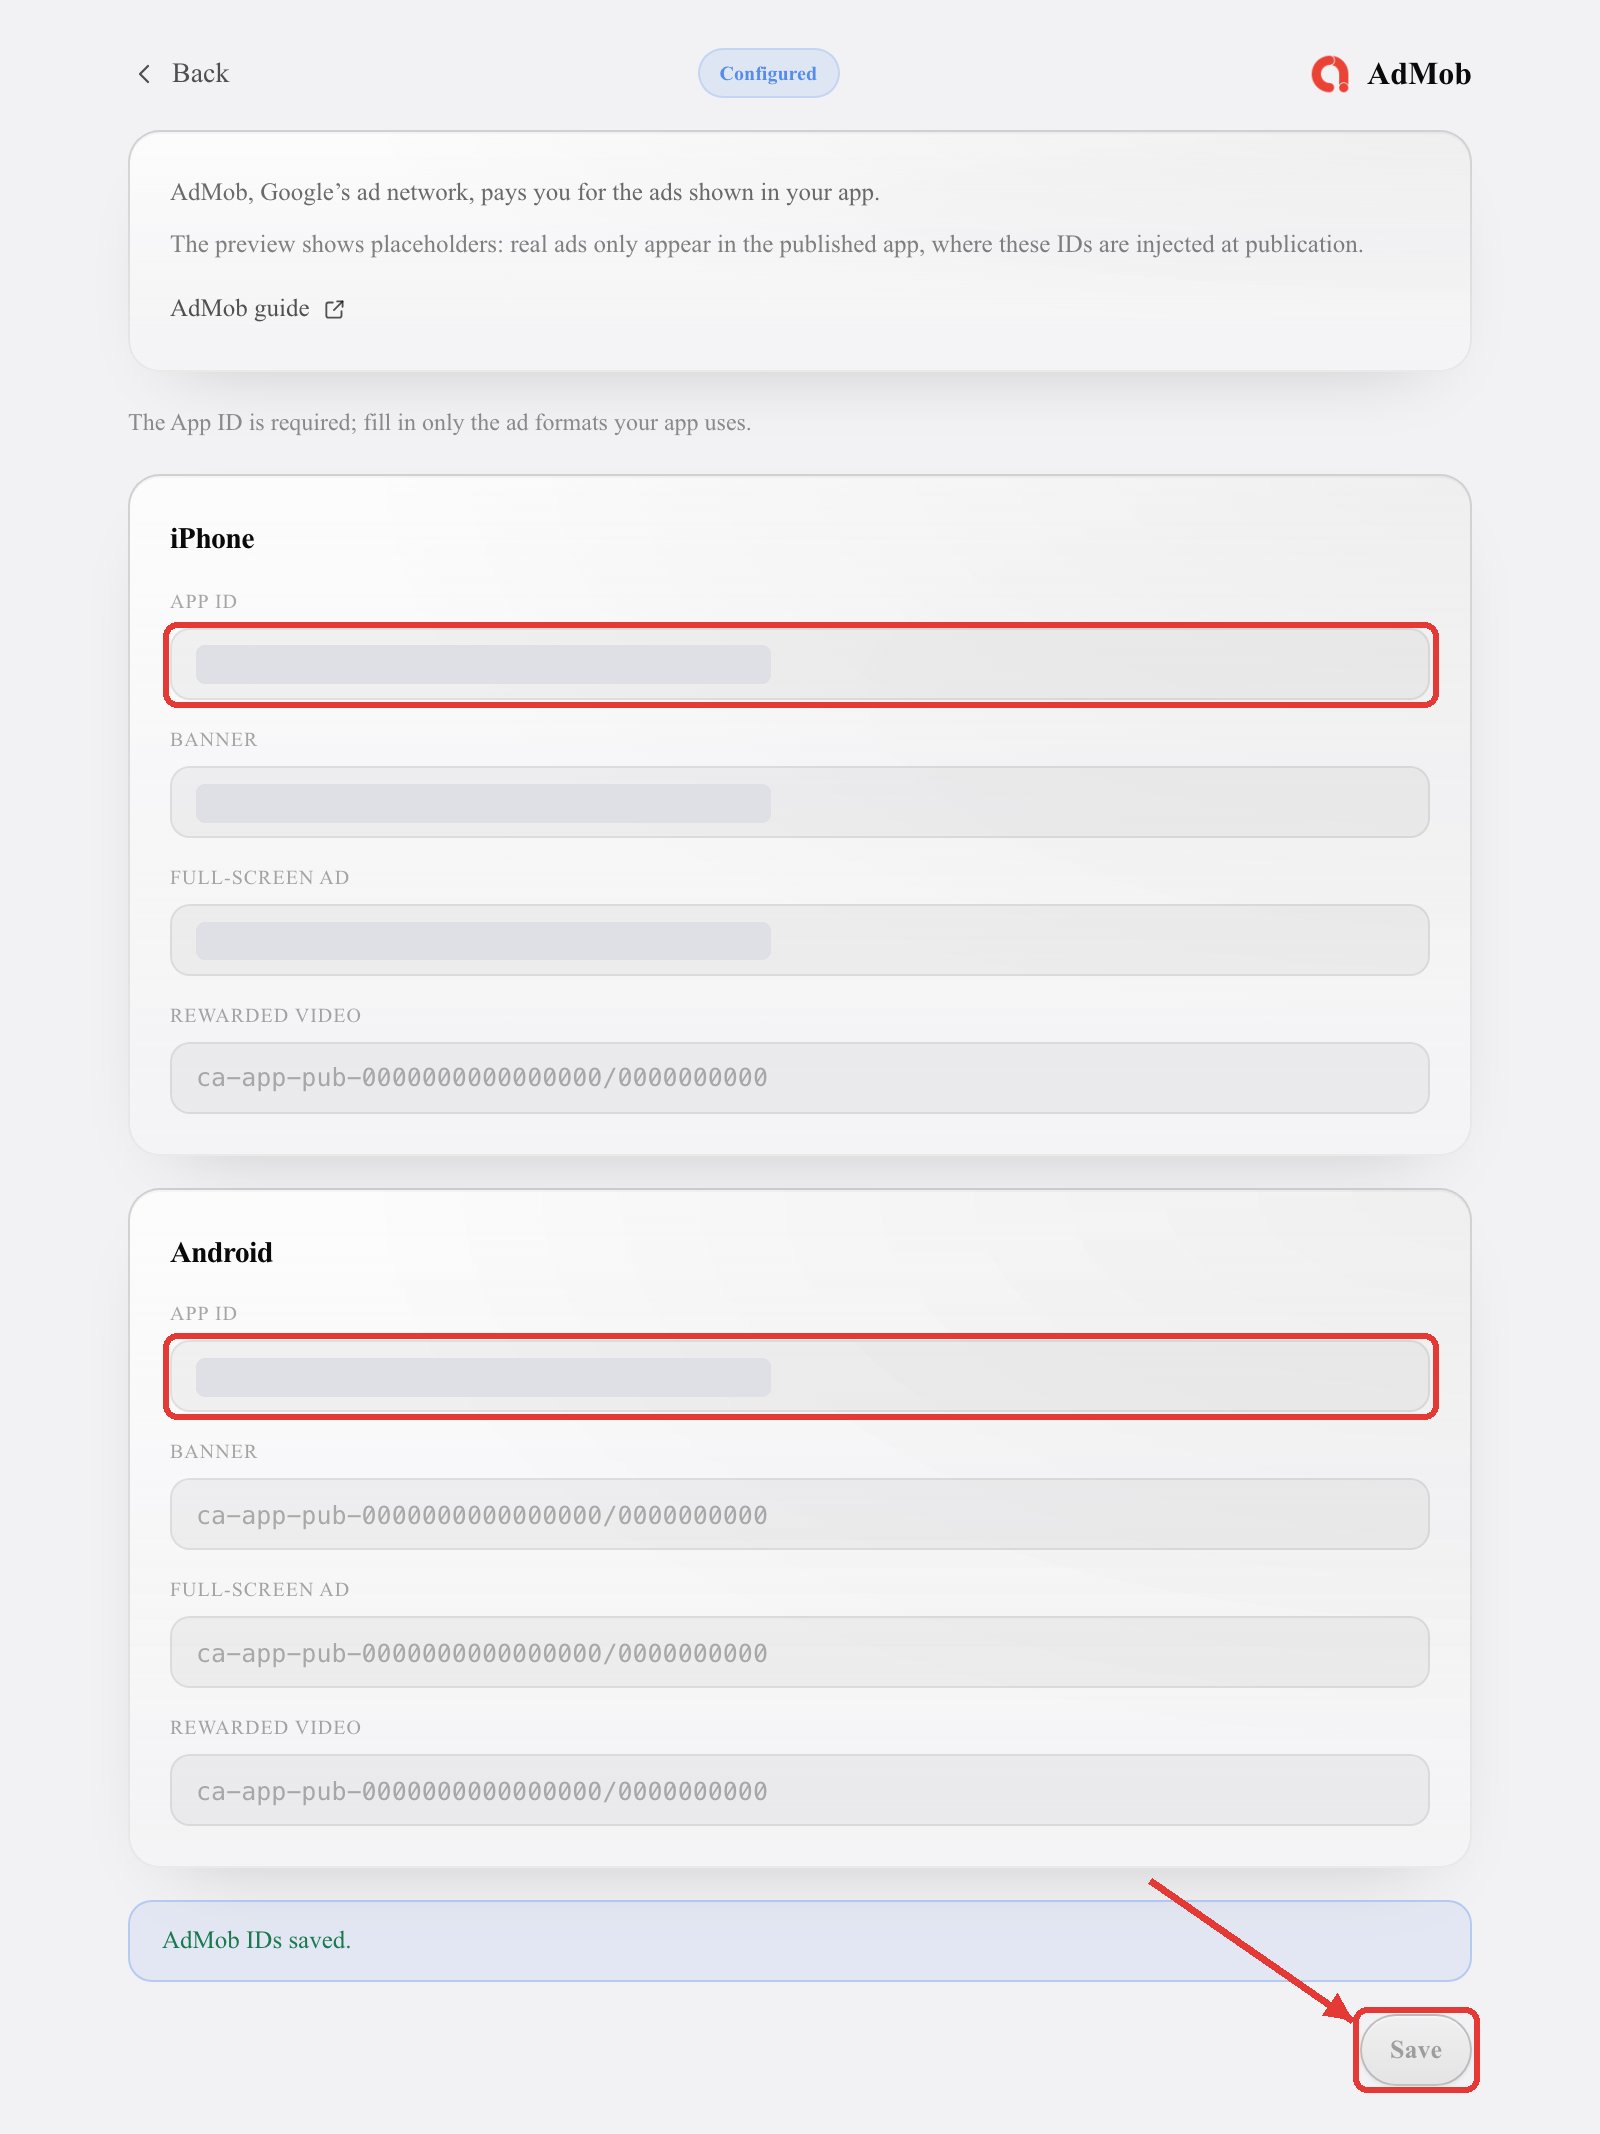
Done when the message AdMob IDs saved. shows up and the badge at the top says Configured.
Bloxks checks each field as you type:
- an ad unit pasted in the App ID field, or the other way round, is flagged: the App ID has a ~, an ad unit has a /;
- Google’s test IDs are refused, because they never earn anything.
Publishing on one platform only? Fill in only its section.
2. Ask for ads in the chat
Describe what you want, in your own words:
Add ads: a banner at the bottom and a video to earn an extra life
Bloxks uses its ready-made ads module and places each ad where it makes sense. You can adjust in the chat, for example "move the banner to the end of the results screen" or "show a full-screen ad after each finished level".
3. What the preview shows
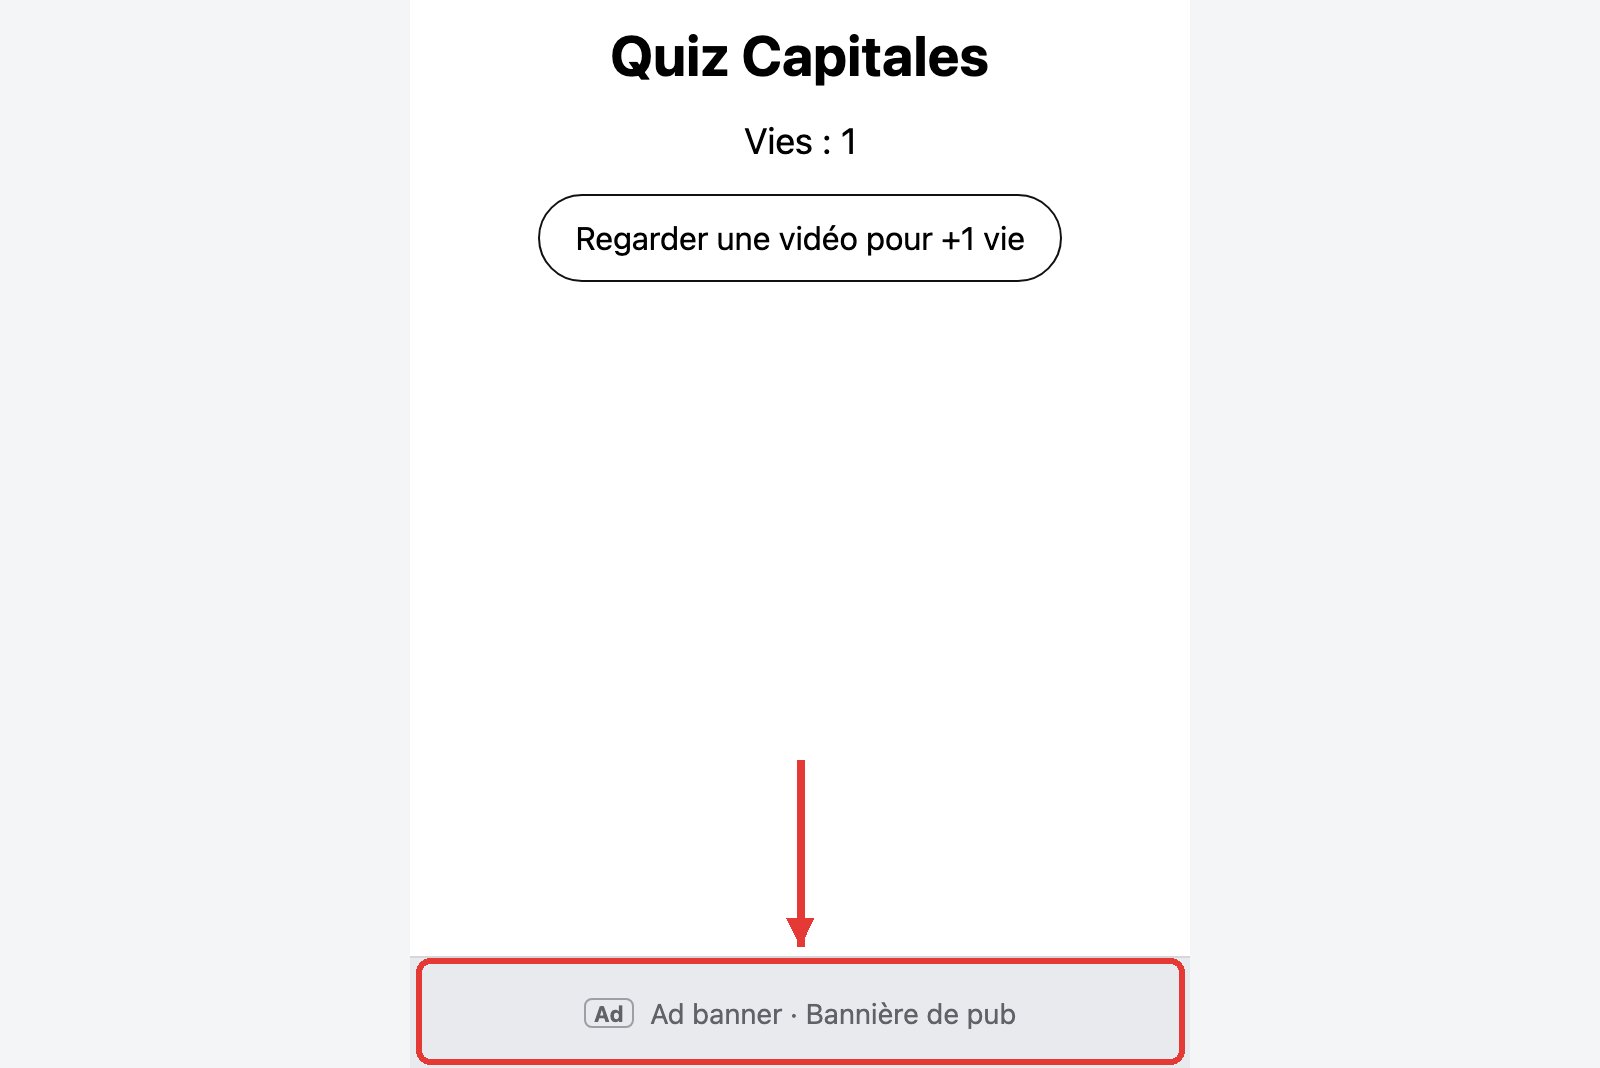
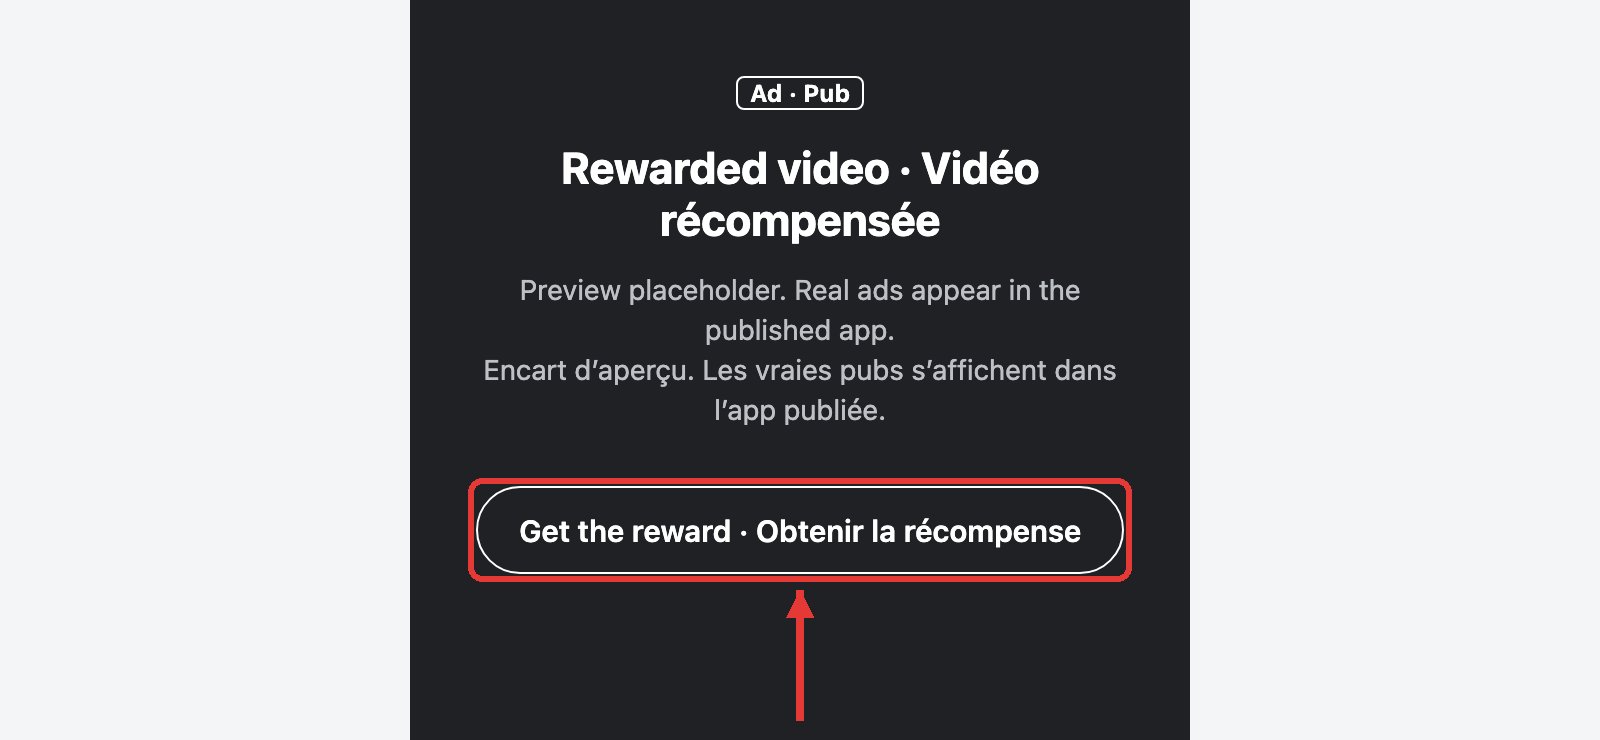
In the builder preview and in Expo Go (the QR code), ads are placeholders: the banner is marked "Ad" ("Ad banner · Bannière de pub"), full-screen ads "Ad · Pub". A notice reminds you that ads are simulated there. Real Google ads only appear in the published app.
The rewarded video placeholder lets you check the reward: tap Get the reward and make sure your app really gives it, like the extra life.
Next step
Before you publish: publish your consent message in AdMob.